
A dripping kitchen faucet isn’t just an annoying sound; it’s a silent source of wasted water and increased utility bills. Before you dial a professional, the good news is that most common kitchen faucet leaks stem from simple wear and tear that a moderately handy homeowner can fix. This DIY guide for troubleshooting a leaky kitchen faucet without calling a plumber will walk you through identifying the leak’s source and replacing the small, inexpensive parts that are usually the culprit.
🛑 Step 1: Preparation and Water Shut-Off
Safety and organization are paramount when working with plumbing components.
- Turn Off the Water: Locate the shut-off valves under the kitchen sink (one for hot, one for cold) and turn them clockwise until the water stops. If your sink lacks these valves, you will need to turn off the main water supply to your house.
- Relieve Pressure: Turn the faucet on briefly to drain any residual water and relieve pressure in the lines.
- Plug the Drain: Cover the sink drain with a stopper or a rag. This is a critical step to prevent small screws, O-rings, or washers from falling into the drain and getting lost.
- Gather Tools: You will need an adjustable wrench, screwdrivers (flathead and Phillips), needle-nose pliers, and plumber’s grease.
🔍 Step 2: Identify the Faucet Type and Leak Source
Knowing your faucet type is crucial, as they disassemble differently and use distinct components:
| Faucet Type | Common Leak Cause | Leak Location |
| Compression (Two Handles) | Worn washers and seat seals. | Leaks from the spout. |
| Cartridge (Single or Two Handles) | Worn O-rings or a faulty cartridge. | Leaks from the spout or under the handle. |
| Ball (Single Handle, Round Cap) | Worn springs and seals in the ball joint. | Leaks from the base or handle. |
The most likely causes are worn-out washers (in compression faucets) or degraded O-rings and cartridges (in modern faucets).
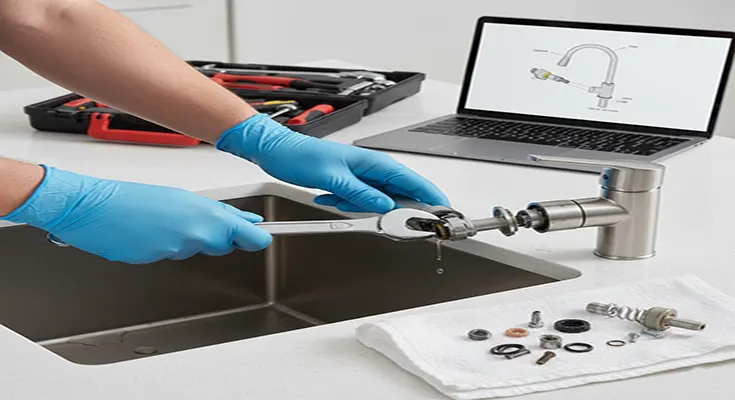
🛠️ Step 3: Disassembly and Component Replacement
You will need to access the inner valve mechanism based on your faucet type. Always take pictures as you disassemble to aid reassembly!
- Remove the Handle:
- Pry off the decorative cap (usually marked hot/cold).
- Unscrew the internal screw(s) and lift the handle off. For single-handle faucets, you may need to loosen a set screw located under the handle or trim ring.
- Access the Valve Mechanism:
- Compression: Use a wrench to unscrew the packing nut and remove the valve stem to expose the internal washer and seat.
- Cartridge: Remove the retaining clip (often a small brass or plastic pin) and pull the cartridge straight out using pliers.
- Inspect and Replace:
- If leaking from the spout (Compression): Replace the seat washer at the bottom of the stem and the valve seat underneath it.
- If leaking from the handle (Any Type): Replace the small O-rings located around the cartridge or stem. Coat new O-rings in plumber’s grease for a smooth, waterproof seal.
- If the leak persists (Cartridge/Ball): The entire cartridge or ball assembly is likely faulty and should be replaced with an exact match. Bring the old part to the hardware store for reference.
- Reassemble: Put the faucet components back together in the reverse order of disassembly, making sure everything is aligned and snug. Do not overtighten the nuts, as this can damage the new seals.
✅ Step 4: Final Test
Turn the water supply back on slowly. Turn the faucet on and off several times, checking carefully around the handles and spout for any drips or leaks. A successful repair should stop the drip immediately. If the leak persists after replacing the common internal parts, the issue might be more complex, such as a cracked valve body or high water pressure, and a plumber’s expertise would be recommended.