
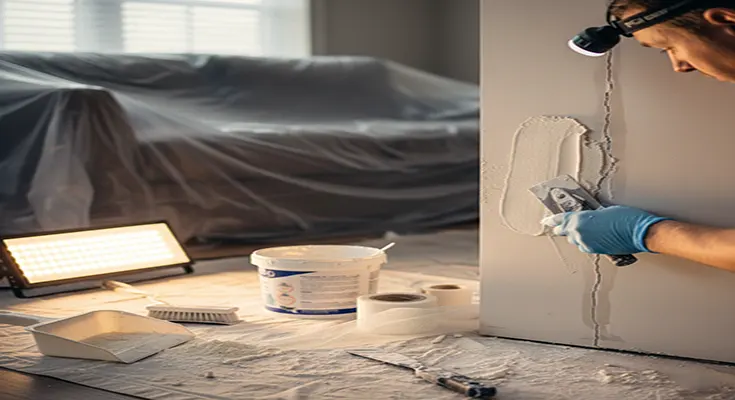
Drywall cracks caused by house settling or temperature changes are frustratingly common. While easy to cover with a dab of spackle, these stress cracks will often reappear because the underlying structural movement hasn’t been accounted for. To achieve a true permanent drywall crack repair, you need to reinforce the area.
This step-by-step guide to repairing drywall cracks from settling details the professional method using the right materials and techniques to ensure your walls stay smooth for good.
Step 1: Preparation is Key (V-Grooving the Crack)
The most common mistake is patching over a hairline crack. For a repair to last, the compound needs to adhere deeply.
- Safety First: Put on safety glasses and a dust mask.
- Open the Crack: Use a sharp utility knife to carefully cut along the length of the crack, creating a slight bevel or a shallow “V” shape. This V-groove allows the repair compound to penetrate and anchor itself securely, providing a stronger bond than surface patching alone.
- Clean the Area: Thoroughly wipe away any loose paint chips, dust, or crumbling drywall. The surface must be clean for the compound to adhere properly.
Step 2: Reinforcement with Mesh Tape and Setting Compound
This step is mandatory for cracks caused by settling, as it provides the necessary tensile strength to prevent the crack from reopening during future minor movements.
- First Coat of Setting Compound: Apply a thin, even layer of setting-type drywall compound (also known as “hot mud”). This powder-based compound cures chemically and dries harder than pre-mixed joint compound, reducing shrinkage and providing superior strength. Do not use lightweight spackle.
- Embed the Mesh Tape: While the compound is still wet, press a strip of fiberglass mesh tape directly over the crack. The self-adhesive tape helps hold the crack together and prevents future shifting.
- Wipe Down: Immediately skim a light coat of the setting compound over the mesh tape using a 6-inch joint knife, ensuring the tape is fully embedded and the compound is wiped almost flush with the wall surface. Let this layer dry completely according to the product instructions.
Step 3: Finishing and Feathering for an Invisible Repair
Once the reinforced base coat is dry, you need to “feather” the edges to blend the repair seamlessly into the existing wall.
- Second Layer (Wider Feathering): Apply a second layer of drywall compound. You may use a pre-mixed compound for easier sanding now. Use a wide joint knife (10 to 12 inches) to apply the compound, making the repair area wider than the first coat. This process of feathering gradually thins the compound towards the edges, eliminating visible lines.
- Final Skim Coat (If Necessary): If you still see the mesh texture or an uneven transition, apply a final, very thin skim coat. Always use the wide knife to ensure a smooth, gentle transition.
- Gentle Sanding: Once fully dry, lightly sand the area using fine-grit sandpaper (120-grit or higher). The key is to sand the compound only, not the surrounding paint. Wipe away all dust with a damp cloth.
Step 4: Prime and Paint
Before painting, apply a good quality primer or a separate coat of paint labeled “primer/sealer” over the repaired area. This ensures the new drywall compound doesn’t absorb the paint unevenly, preventing a dull or “flashed” look.
By taking the time to V-groove, reinforce the crack with mesh tape, and properly feather the layers, you ensure your drywall compound application results in a professional, long-lasting repair that puts an end to frustrating re-cracking.