
Most modern bathrooms are designed to impress. Nowadays, some of them even resemble spas. However, one truth hasn’t changed in those areas of our home: hygiene is everything.
A bathroom that looks the part but harbours mildew, soap scum, or streaky glass loses its charm quickly. However, you can easily keep yours genuinely clean, provided you follow a few simple tips and tricks.
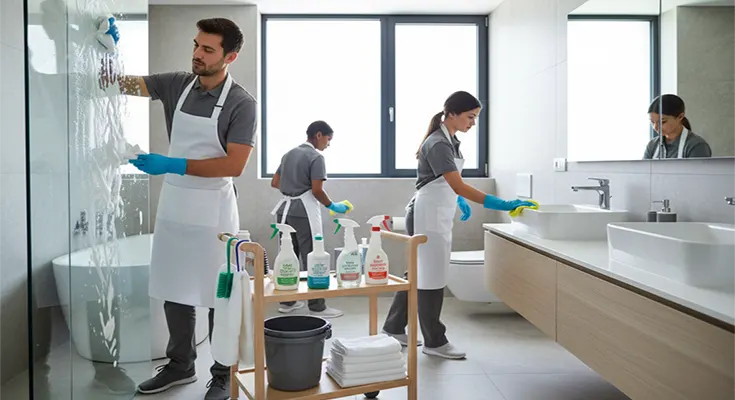
Stock Your Cleaning Kit
Before you take on the tiles, it pays to get your kit in order. Professionals don’t waste time running back and forth for supplies, and neither should you. The right tools will save your elbows and cut your cleaning time in half.
Start with the basics. At a minimum, you should have a quality all-purpose cleaner, a decent glass spray, and a disinfectant you actually trust.
If you prefer a greener approach, kitchen staples like white vinegar and bicarb soda are as effective as anything bottled in neon plastic bottles, and they won’t leave the bathroom smelling like a chemical factory.
Microfibre cloths are non-negotiable. Unlike old rags, they lift dirt instead of smearing it around, and they’ll last for ages if you wash them properly. Pair them with a sturdy scrubbing brush for grout and a softer one for taps and fittings.
If your bathroom has high ceiling corners or awkward nooks, an extendable handle will save you from risky acrobatics on the edge of the bathtub.
With everything in one portable caddy, you’re now ready to grab it and go when it’s time to clean. Once it’s set up, half the battle is already won.
Streamline Your Space
A bathroom cluttered with bottles, towels, and half-used lotions can make thorough cleaning a challenge.
Before starting, clear all items from benches, shelves, and floors. While this may seem like an extra step, it allows you to access every surface effortlessly—no need to manoeuvre around shampoo bottles while scrubbing the sink.
Once you’ve removed these items, seize the opportunity to clean all storage areas. Wipe down the insides of cupboards and drawers, clean behind the toilet, and run a damp cloth over shelves before reorganising.
To maintain this neatness long after your cleaning session, group items by their usage. Also, try to keep daily essentials, such as toothbrushes, hand soap, and moisturisers, within easy reach.
Meanwhile, less frequently used items, like bath oils, spare razors, or guest toiletries, can be stored in clearly labelled containers under the sink.
Where possible, opt for vertical storage solutions. Stacking trays, shelf risers, or slimline caddies maximise limited bathroom space, keeping counters clear and clutter-free.
Apply Products the Smart Way
The real secret to a professional finish isn’t how hard you scrub, but how well you let your products do their job.
Always begin at the top. Start with the mirrors, shelves, and splashbacks, then work your way down to the sinks and tiles, and finally the floor. This way, dust or anything that drips will land on a surface you haven’t cleaned yet.
Patience pays off, too. Sprays and solutions need a few minutes to break down soap scum or limescale, so give them that time before you start wiping.
Once you do, use motions suited to the surface, such as gentle circles on porcelain to avoid streaks, and long overlapping strokes across benchtops so every inch gets covered.
Your timing can also give you an edge. The steam from a hot shower softens grime, making it the perfect moment to tackle glass screens or tiled recesses.
For Australians living in areas with hard water, a quick wipe with vinegar before your regular cleaner can prevent chalky stains from setting in, keeping taps and glass crystal clear.
Address Individual Areas
With the general method in place, you can now move through the bathroom piece by piece.
Begin with the mirrors and glass, which are the spots most likely to show streaks if rushed. A slow, overlapping motion brings out that clear finish, and once polished, they immediately lift the whole room.
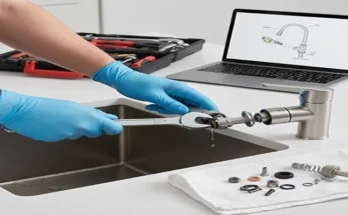
Next, focus on the fittings. Taps, showerheads, and handles may be small, but they’re the first to betray watermarks or soap residue.
A gentle scrub followed by a quick polish restores their shine without scratching delicate surfaces. As for the bowl, just let the cleaner sit before brushing, so the product does the heavy lifting. Patience really pays off here.
Tiles and grout come last. By the time you reach the walls and floors, dust and runoff from earlier steps will have settled, so this is your chance to finish strong. A sturdy brush will bring life back to grout lines, while a bicarb paste can handle any stubborn patches.
Step back afterwards and you’ll see the transformation build from top to bottom, exactly as the professionals do it.
Disinfect High-Contact Areas
A bathroom can sparkle at first glance, but the real test of hygiene lies in the details. The places you reach for repeatedly, such as the tap handle, the door latch, and the flush button, are the very spots that gather germs.
Giving them a regular once-over with a disinfectant keeps everything truly clean, not just surface-level polished.
Moisture-heavy corners deserve the same scrutiny. Shower seals, grout lines, and window frames can foster mould before you even notice. Often, the first hint is a faint musty whiff or a shadow of discolouration creeping in.
Tackle these early with an anti-fungal cleaner or a vinegar solution, and you’ll save yourself the headache of scrubbing at a full-blown outbreak later.
Clean those hidden troublemakers, and the rest of your bathroom will feel fresher, brighter, and far more inviting.
Establish a Maintenance Routine
Consistency is the secret to a fresh bathroom. In fact, small daily habits make a huge difference. A quick wipe here and there will prevent buildup and make deep treatment sessions much easier.
Mop the floor and polish the mirrors weekly to keep things pristine. Then, once a month, tackle bigger chores like scrubbing the grout and removing limescale from the shower.
Make tidying up part of your routine. For instance, you can organise the space while waiting for your bathtub to fill up. Getting everyone involved will also make this even easier. The room will remain spotless for longer when the entire family helps out.
Using a cleaning company is a smart move if you are too busy to do this yourself or are preoccupied with other obligations. They have specialised tools that make addressing stubborn mould or frustrating mineral deposits a breeze.
Conclusion
A sparkling, fresh bathroom is completely within your reach. All it takes is the right approach, a little consistency, and implementing the tips you have just picked up.
So, don’t let soap scum and mildew sneak up on you. Take charge, put these techniques into action, and watch your space transform.
Your dream washroom is closer than you think!